- About Pims
- General
- User Interface: Web
- User Interface: Win
- Administration Tools
- Procedures
- Completion Management
- General
- Setup and Configuration
- Engineering
- Field Inspection with Mobile Apps
- Project Overview
- Handovers
- Commissioning
- Scanning
- Documents and Drawings
- Windows Client
- Reference Materials
- Document Control
- General
- Managing Documents
- Accessing/Searching for Documents
- Subscribing to a Document
- Creating New Documents
- Creating Missing Document as Contractor
- Creating New Document Revision
- Reserving Revisions
- Document Profiles
- Creating native files PDF rendition
- Adding Cover Page
- Uploading New Revisions as Contractor
- Initiating Internal Collaboration
- Initiating a Document Approval
- Editing a Document Approval
- Deleting, Voiding, Superseding a Document
- Moving Document Data Between Profiles
- Checking up on Documents' Status
- Distributing Documents for Information
- Distributing Documents Using Trays
- Sending Document Reminders
- Exporting Documents as Importable Datasheets
- Offline Archives
- Importing an MDR
- Modifying Import Data
- Processing Documents Submitted by Contractors
- Distributing Documents (older version)
- Documents Import and Export (older version)
- Sharing Documents and Correspondence
- Managing Interface Documents
- Redlining Documents
- Managing Reviews
- Initiating a Document Review
- Editing Review
- Sending Review Reminders
- Adding Reviewers
- Removing Reviewers
- Performing a Review with PDF files
- Performing a Review non-PDF Files
- Performing a Review with SharePoint
- Consolidating Comments
- Returning Reviewed Documents to Contractors
- Viewing Review Comments as Contractor
- Responding to Review Comments as Contractor
- Managing Review Response Replies
- Tracking Review Status
- 3rd Party Verification
- Status of a 3rd Party Verification
- Managing Correspondence
- Operations Phase
- Understanding Asset Domain
- Understanding Site Modifications Domain
- Managing Site Modifications
- Adding Documents to Site Modification
- Handing over Documents to Operations
- Managing Conflicts in Site Modifications
- Managing Distribution Setup in Site Modifications
- Concurrent Engineering - Alternative Way of Handling Site Modifications
- Managing Certificates
- Setup and Configuration
- Setting up a Contract
- Managing Distribution Setup
- Importing Distribution Setup
- Inquiring Distribution Setup Input
- Managing Correspondence Distribution Templates
- Managing Documents Distribution Templates
- Setting up Distribution Groups
- Setting up Email Templates
- Setting up Offline Archives
- Setting up SharePoint Integration
- Setting up SharePoint filename template
- Setting up Document Cover Page Template
- Setup and Configuration
- Miscellaneous
- Cost Management
- General
- Project Control Basis
- Contracts Management
- Change Management
- Personnel
- Progress Measurement
- Interfaces
- Reporting
- Windows Client
- Workflows
- Quality Management
- General
- ITP Register
- Surveillance Register
- Activity Register
- Activity Details Management
- Activity Plan
- Checklist Register
- Finding Register
- Export, Import, Copy or Move Activity
- Program Register
- Configuration - Domain
- Configuration - Global
- Risk Management
- General
- Add New Risk
- Risk Register
- Risk Details Management
- Risk Assessments
- Actions Register
- Action Details Management
- Risk Plan
- Risks Dissemination
- Export, Import, Copy or Move Risks
- Risk Dashboard
- Configuration - Domain
- Import Setup
- Risks - Risk Breakdown Structure
- Risks - Inputs Labels
- Risks - Show/Hide Functionality
- Risks - New Risk
- Risks - Fields Setup
- Risks - Dropdown Values
- Risks - Multiple Choice
- Risks - Keywords
- Risks - Lifting Functionality
- Assessments - Configuration
- Assessments - Project Borders
- Actions - Show/Hide Functionality
- Domain Settings - Notifications
- Configuration - Global
- Configuration - Roles
- Desktop legacy user guides
- Reporting
- HSE Management
- Preparation & Execution System (PES)
- PES Release Notes
- About
- Administration
- Asset and Plant register
- Case Register
- Checklists
- Compliance Activities
- Compliance settings
- Contact Lookup
- Courses
- Currencies
- Default Colors
- Definitions and abbreviations
- Delivery Lines
- Disciplines
- Documents
- Locations
- Packages
- Position
- Position Settings
- Punch Items
- Statuses Overview
- Sub Systems
- Subsystem Handover Status
- Tag Register
- Tasks
- Work Breakdown Structure (WBS)
- Digital Procedures
- Handover
- Meetings
- Organization
- Personnel On Board (POB)
- Portal
- Progress & Trending
- Project Assurance
- Service Request
- Work Process
- Planning & Scheduling
- Material Management & Logistics
- About Material Management & Logistics
- Stock & Materials
- Procurement
- Warehouse & Packing
- Shipping & Logistics
- Rental Items
- Tool Request
- Settings
- Work Preparation & Work Order
- Work Preparation Request (WPR)
- Work Order (WO)
- Work Order Settings
- Work Orders - Settings Overview
- Work Order - Default Attachments
- Work Order - Types
- Work Order - Requirements
- Work Order - Checkpoints
- Work Order - Mhrs Type
- Work Order - Trades
- Work Order - Phases
- Work Order - Keywords
- Work Order - Hold Codes and Job Status
- Work Order - Factor sets
- Work Order - Settings
- Work Order - Norms
- Work Permit (WP)
- Livening Up & Down Notice (LUDN)
- Overtime Request Register (OTR)
- Query Management
- Query Managment - User Guide
- Workflow Modules
- General
- Setup and Configuration
- Controls
- Action Tracking
- Concessions / Deviation Requests
- Interface Management
- Management Of Change
- Technical Queries
- Lessons Learned
Organization (Automated Chart)
 Automated organization charts Generate organization charts in seconds. Select a top-level (position) that the chart is being structured on. This sets the hierarchy of the chart and the system will automatically generate and draw an organizational chart. |
Note! Organization charts is populated based on registered positions. Positions needs to be setup in advance before creating a new chart. |
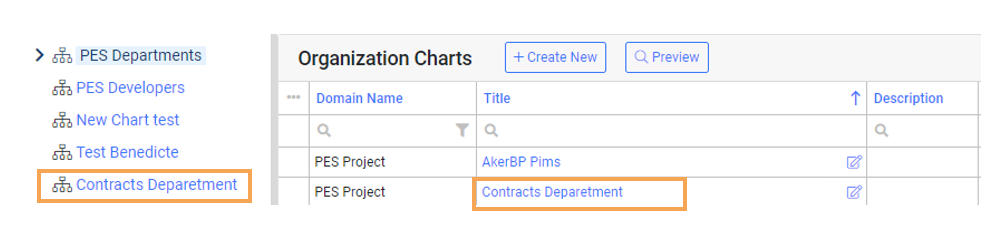
Organization chart register
Locate Organization Charts by searching in the open field of your menu. This will direct you the register that lists all registered organization charts in the system.

Open a chart by clicking on Organization Chart Title link highlighted in blue in the grid or click on blue links in the left panel.
Create a new chart
Click on + Create New

Select Domain, Title and the Top Position. Click Create
The organization chart will then automatically generated based on the selected Top Position. 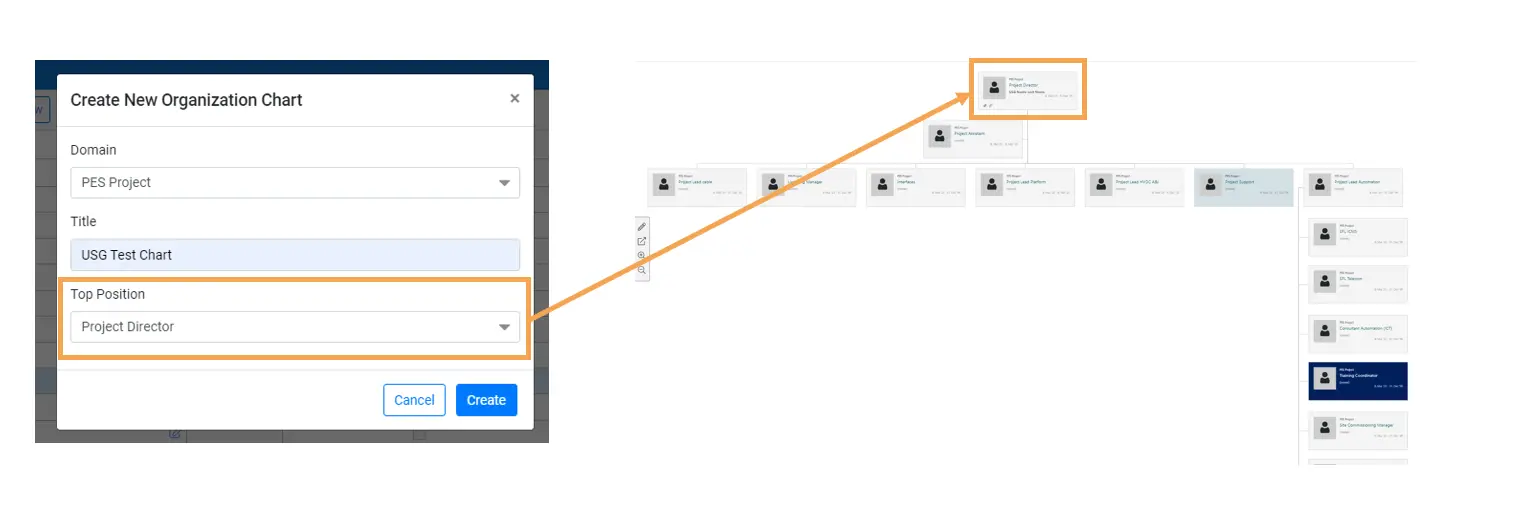
The selected Top Position sets the hierarchy of the chart that is being generated.
Note ! The Level of details the organization card hold is based on registered details created in position and person - The Arrow will direct you back to the Reporting Position. - The three dots is a menu for E-Mailing options. - Additional Links and color styling on single cards are added in Card settings. Read more under the Edit Card setting section. | 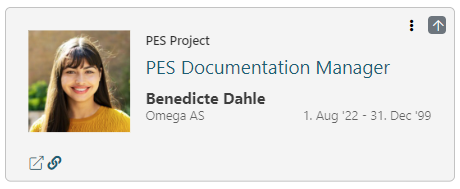 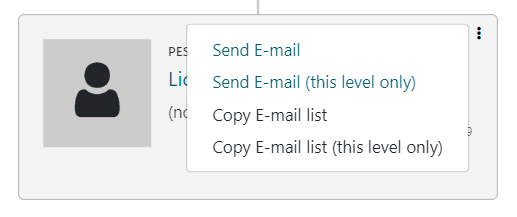 |
Navigation
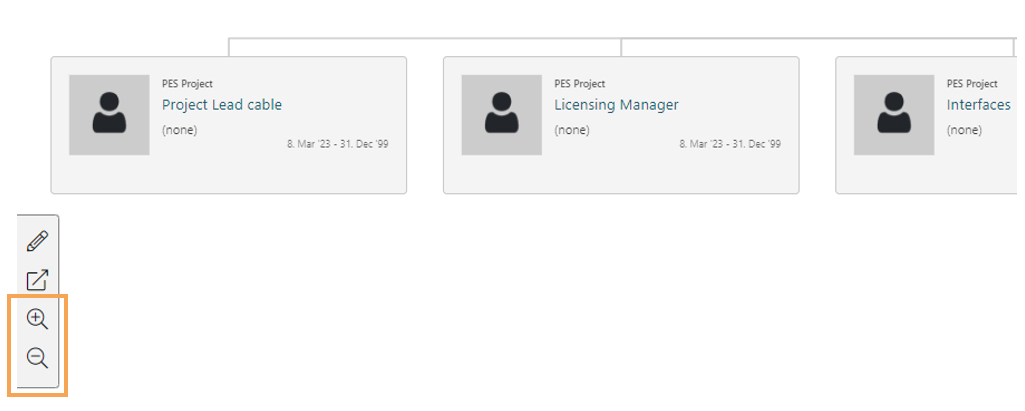
To Zoom in and out you can use mouse Scroll or click on the + an - icons located at right side.
 To navigate horizontal - click in the view with your mouse and drag.
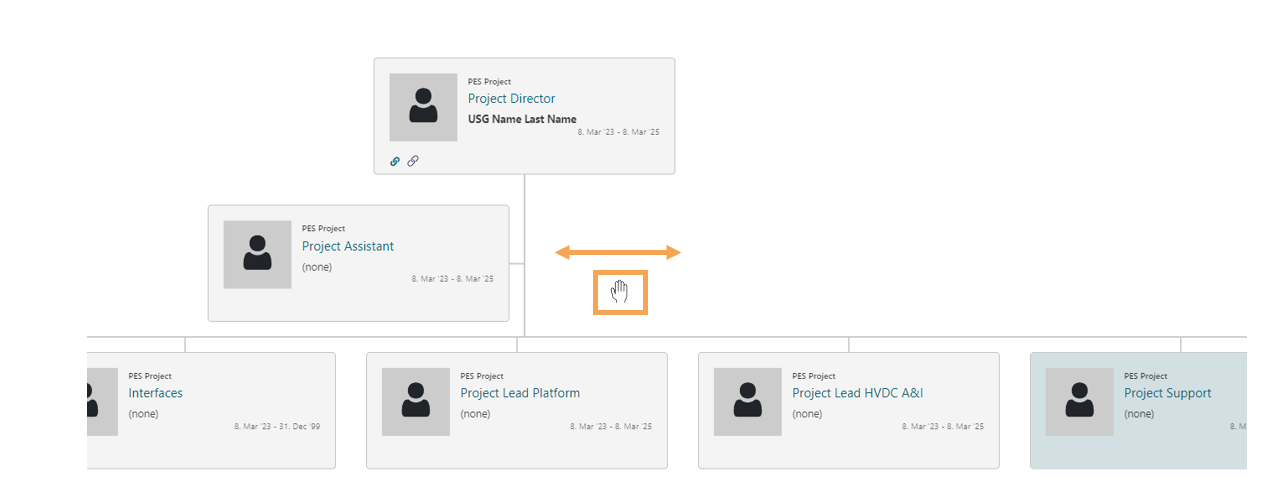
Navigation Levels
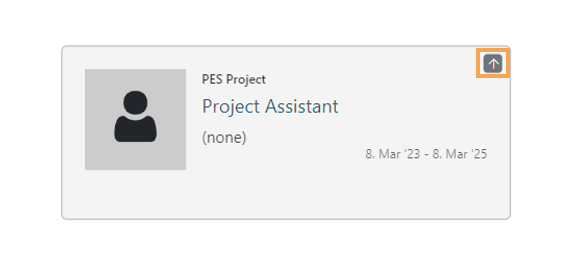
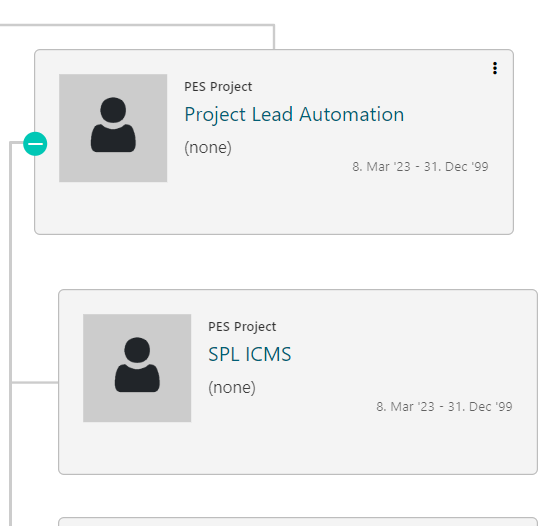
When you click directly on a card , the view will change and set the focus the selected card and its level. To go back to Reporting Position click the arrow.
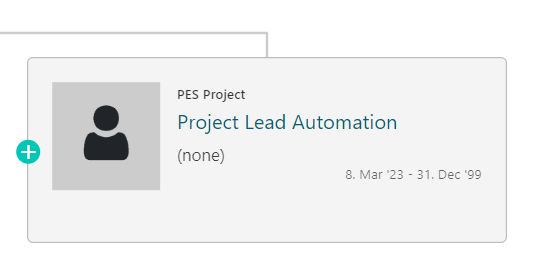
Expand the level by clicking on the ( + ) symbol of the card and decrease the level view with the ( - ) When you click on a card your view is changed to show the current level of the chart.
Position Details
To view more detailed information, click on the Position Link on the card. 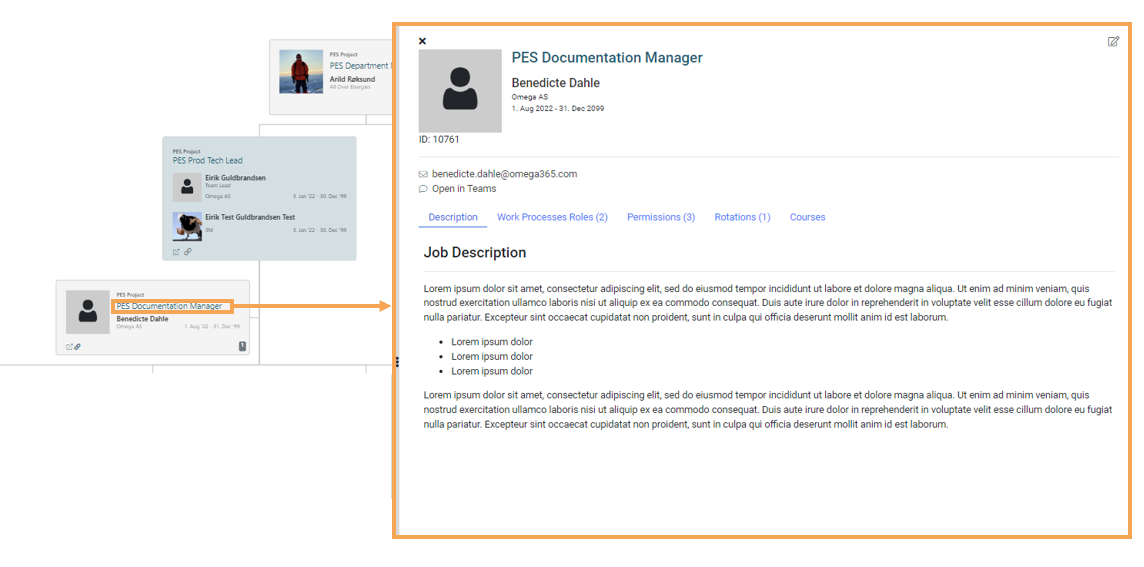
A side panel with Position / Card details will appear.
Note! The side panel window is flexible. Click on the  and drag to expand/decrease the sidepanel view. and drag to expand/decrease the sidepanel view. |
The top section of the side panel holds key details and contact details.
- Click on "Position Title" to be directed to Position details.
- Click on "Name" to be directed to Persons details.
Position Details - tabs
Below the contact section there are tabs that hold further information. The tabs have counts that is showing the number of records within a tab.

- Description: Job description for Position ( Note! Description tab will only show if details exists. )
- Work Process Roles : Lists Work Process Roles. Work Process role nominates workflow signatures.
- Permissions: Lists Permission roles for different modules in Pims.
- Rotations: If the Position is registered with a rotation, rotation details will show here.
- Courses: Lists courses on selected position and the course status.
Note! Administration of these settings is in Position details. You can easily get directed to this view by clicking on Position link , this will directed you to the selected Position detail view. |
Compare Menu
In the detail view you have the option to compare what the selected user have access to compared to you, on current domain.
Click on compare menu Link. 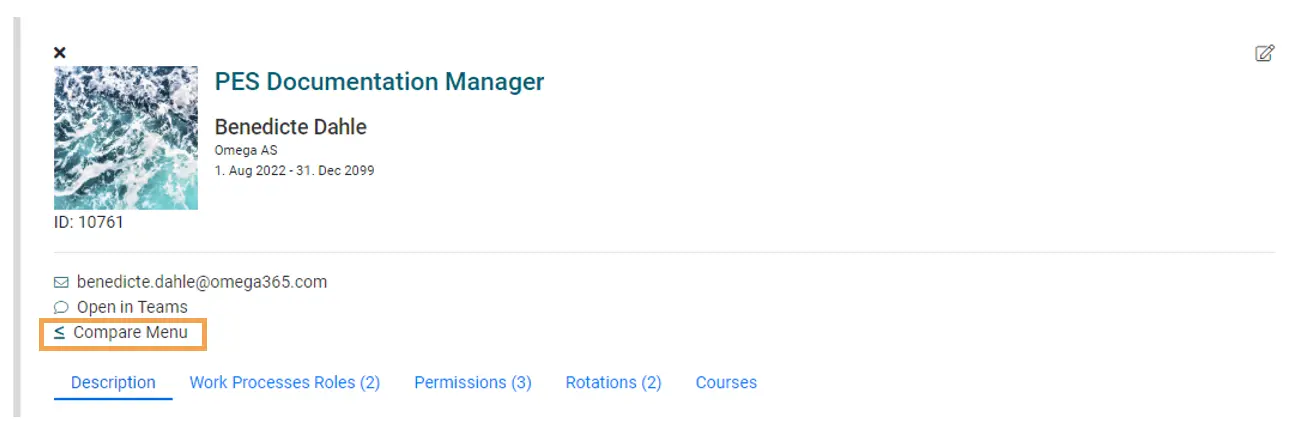
This will direct you to the Compare Menu page, where you can compare menu access to other users.

Edit (Settings and Links)
Click on edit icon located at the top right corner off the sidepanel.
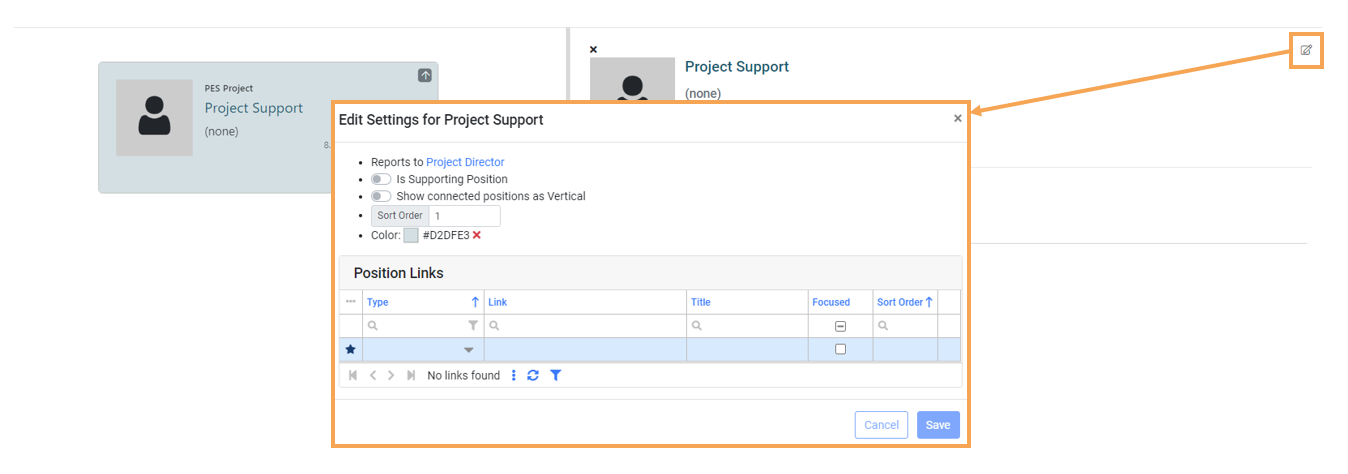
In this window you administrate settings for the selected card.
Settings:
Reports to ( Link to reporting Position ) Settings for reporting position is administrated in Position details. | |
By activating "Is Supporting Position" the card will be re-structured/ re-drawn to show as a supporting Position in the main chart. | 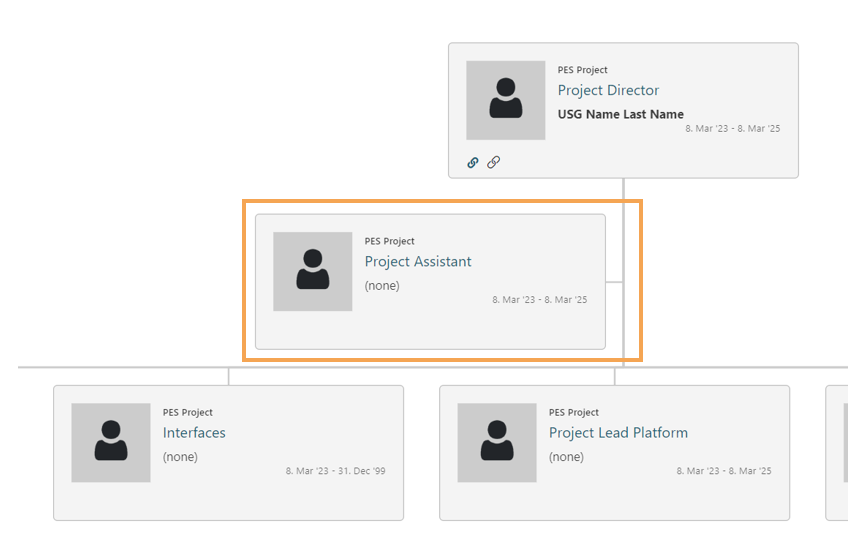 |
By activating Show connected positions as vertical you will change the selected and connected positions to be shown vertically in the chart. | 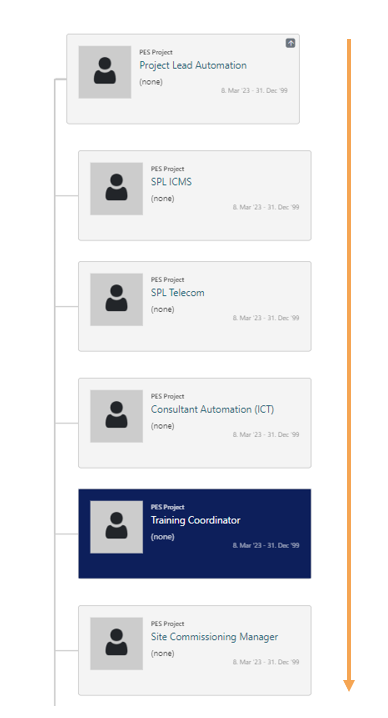 |
Sort Order. Option to sort the order of card that are shown in the selected level. | 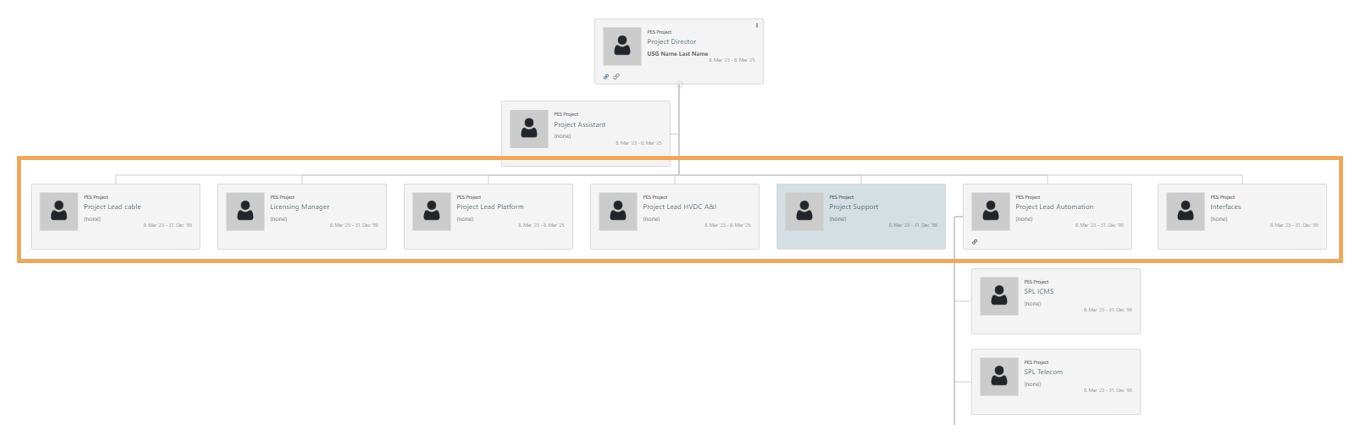 |
Select Color from list. Add or edit colors to this list in Default Colors. Clear the color by clicking x. |  |
Click in the grid to add Links to the selected card.
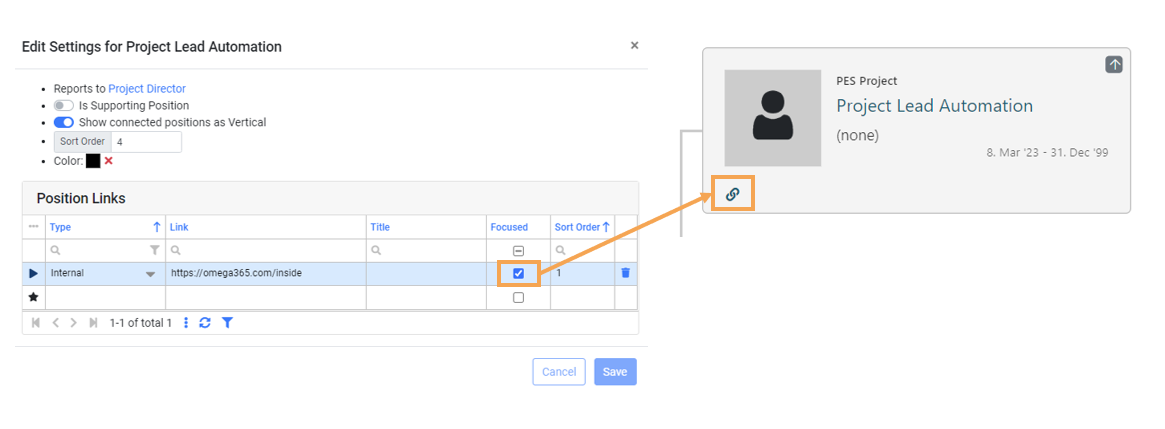
Type: Select Type (Internal or External)
Link: Insert URL Link
Title: Optional
Focused: Link icon will show in bold on the card.
Sort Order: Option to select order of links (if multiple link)
Edit Organizational settings
Click on the pencil icon to edit settings.
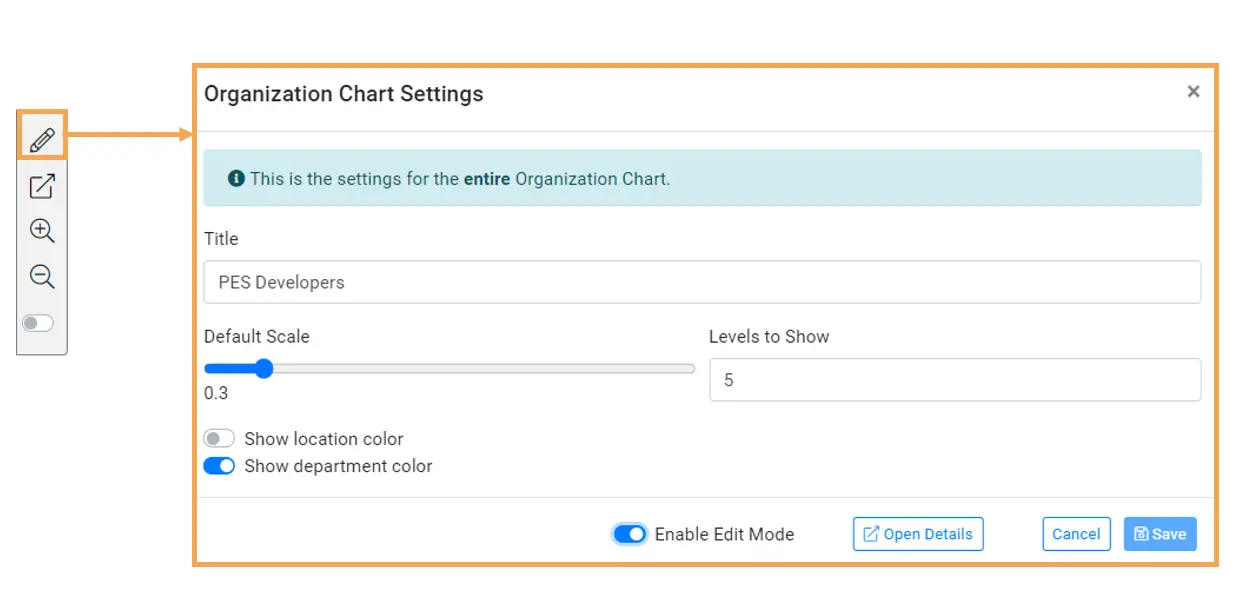
This is the setting for the organization chart. Use the slide of the default scale to adjust the default view of the chart and define levels to show. This pop-up box is movable, click on the top section to move the box and view settings adjustments you have made simultaneous. To show location / department color activate the switches. Click Save.
Edit Mode (Create multiple positions and connect positions)
To enable edit mode, activate the switch in organization chart setting. (see image above) Close the window for orgizational settings

When enable mode is activated an icon will appear when you are hovering over a position.
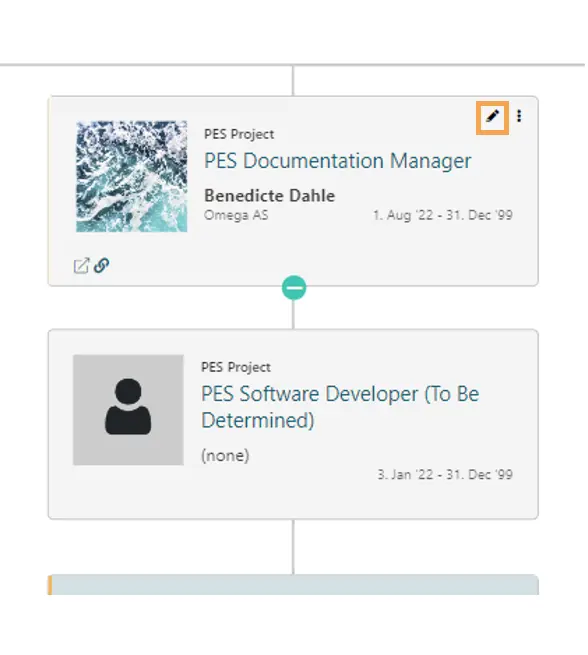 Click on the pen icon, a new pop-up window will appear where you can manage the connected positions (remove existing, connect a new) or create new position(s) that is reporting to the selected position.
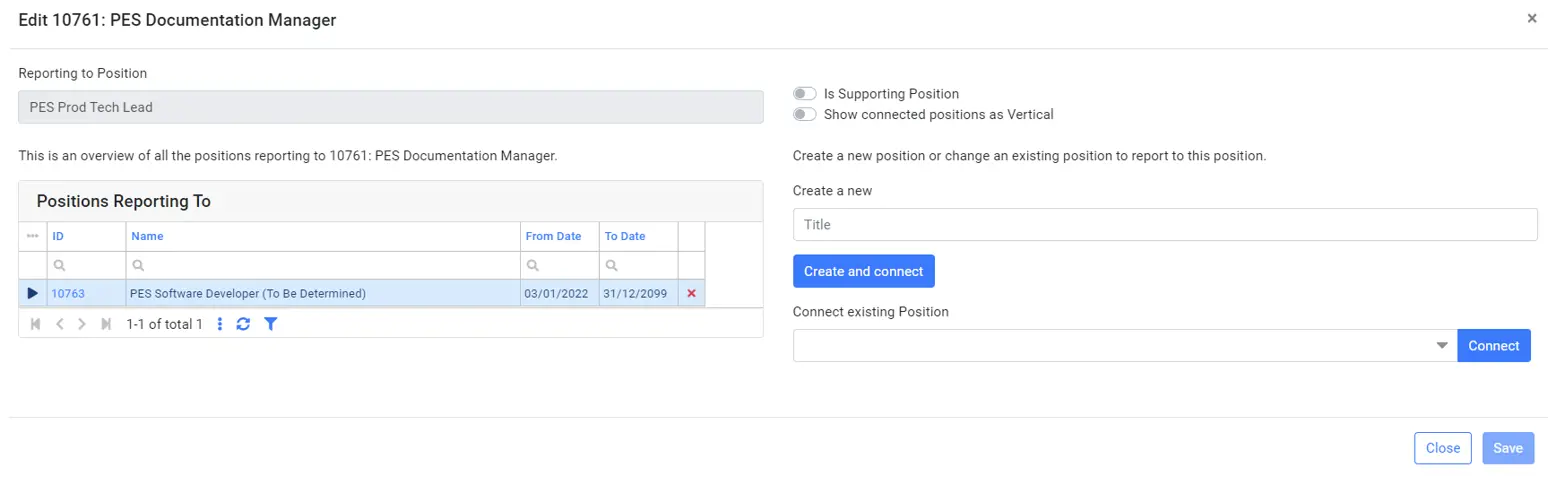
Note ! This function is useful to easily create new positions and connect positions within the organization module. |
Add new reporting positions: Click Create an connect . Add details and click create Postion, the Reporting to Position ID will be linked.
Create multiple: Click batch to create multiple postions that is reporting to existing position.
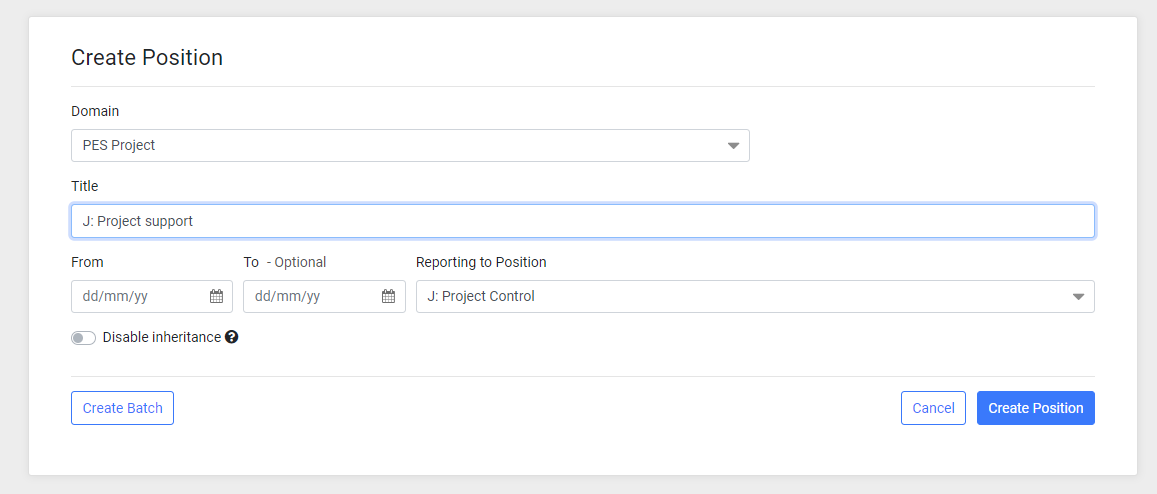
Chart details and Level settings
In chart details you add more information to the chart and administrate chart Level settings.
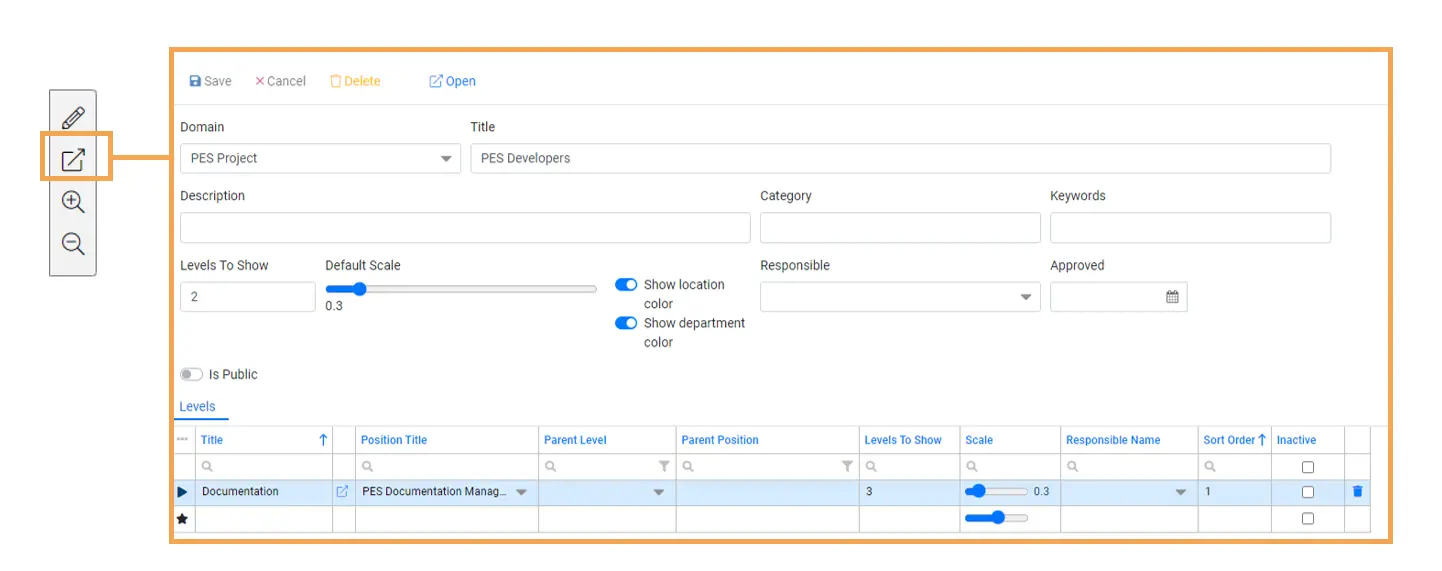
To add a new Level click in the Title column next to the star icon.
Title: Add Level Title
Position Title: Select Position from drop down list
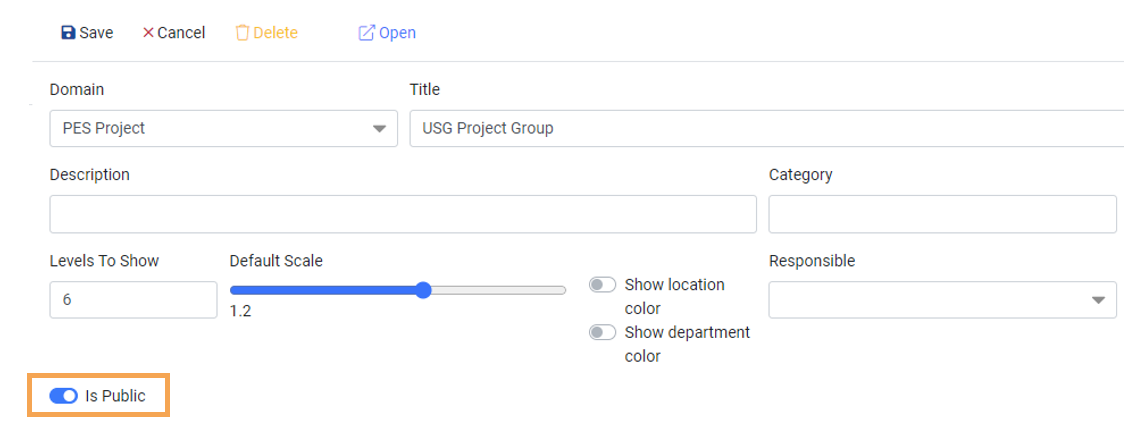
Set Chart as Public
Activate the switch in Chart details to set a chart as public. This allows charts to be organization-wide/meaning all users can access the chart.
Print chart
 Click on Print icon located in the top right corner. A pdf will be generated and uploaded to your computer.