Menu
3rd Party Verification
Some projects may require that some parts of project verification are outsourced to ensure appropriate project reviews of a pre-defined scope (i.e design, fabrication, installation, etc.). Pims can facilitate such verifications using its 3rd Party Verification process. The following guide is about using the process after it has been set up. The required setup up for contracts and domains are explained in their separate articles.
NB: Three of the main 3rd Party Verification apps show the same title in the toolbar. To make referring to each app easier, they will be given different titles in this article:
- 3rd Party Verification Register for "dcs-verification-contracts";
- 3rd Party Verification Overview for "dcs-verification-search";
- 3rd Party Verification Uploads for "dcs-verification-upload".
3rd Party Verification Process as a Contractor
Accessing 3rd Party Verifications
Accessing 3rd Party Verifications is usually done through the 3rd Party Verification Register, accessible from the main menu for contractors as "3rd Party Verification". In the app, there are two lists: "My Contracts" and "My Verification Contracts". In both, contracts that users are a part of appear in black text and have associated contracts that are displayed as links.
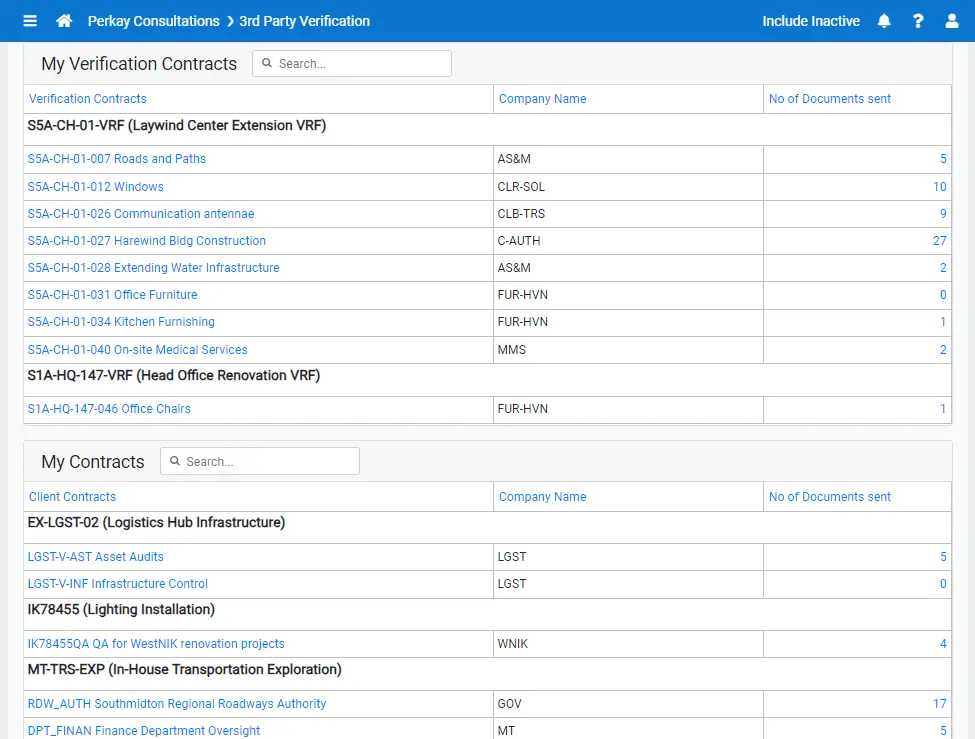
- "My Contracts" shows contracts that can send out their documents/files for verification. The associated contracts are the verification contracts that the main contract can send its documents to;
- "My Verification Contracts" shows verification contracts. The associated contracts are ones that have set the main contract as one of their verification contracts.
Each of the links in the grids represents a contract pain - an originator contract and a verifier contract. The links lead to the overview app for the verifications belonging to the selected pair.
NB: A user can simultaneously be a part of a contract that sends documents for verification and one that carries out verifications. They cannot, however, participate in processes where they would be both the originator and the verifier.
Submitting Files for Verification
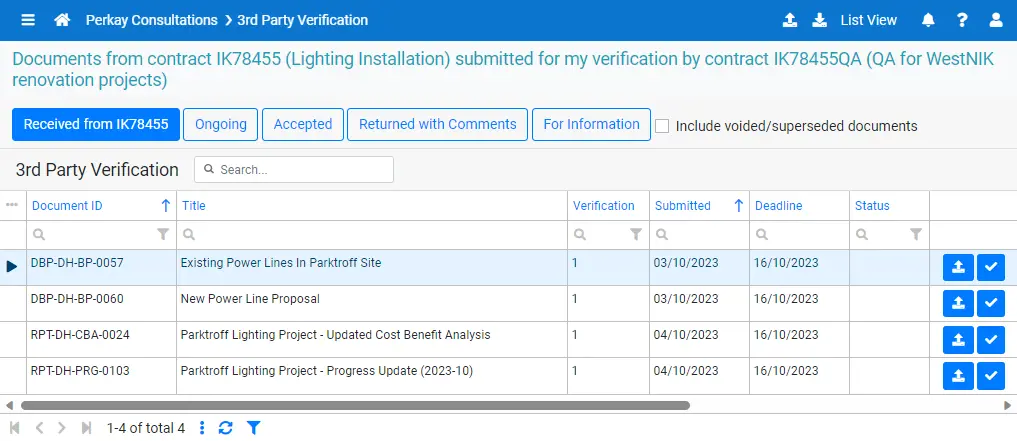
Having a selected a contract pair from the "My Contracts" grid, users will be taken to the 3rd Party Verifications Overview app. The app shows all verifications for the selected pair of contracts. Premade filters are available to filter by verification status. The "Include voided/superseded documents" checkbox toggles whether to show verifications for voided or superseded documents and cancelled verifications. There's also a toggle between grid and list view. You will need to use list view to see files associated with verifications.
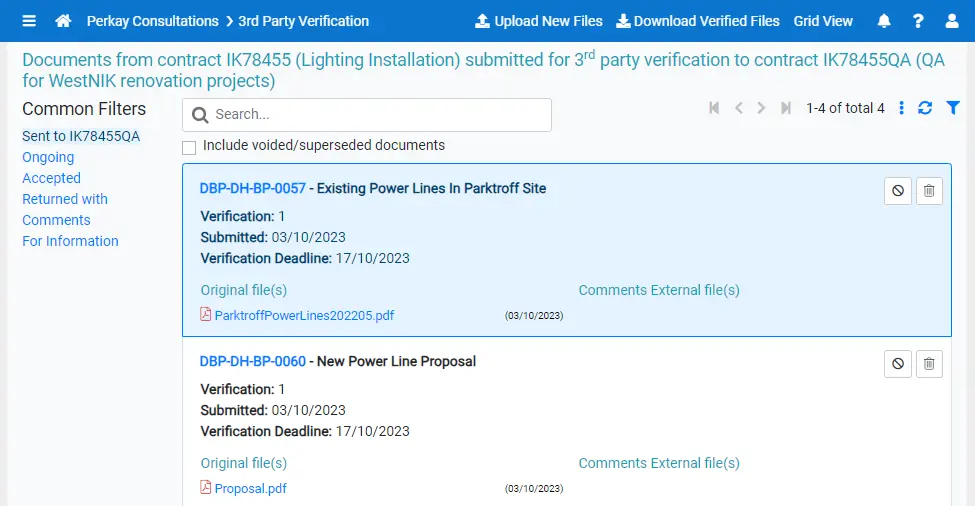
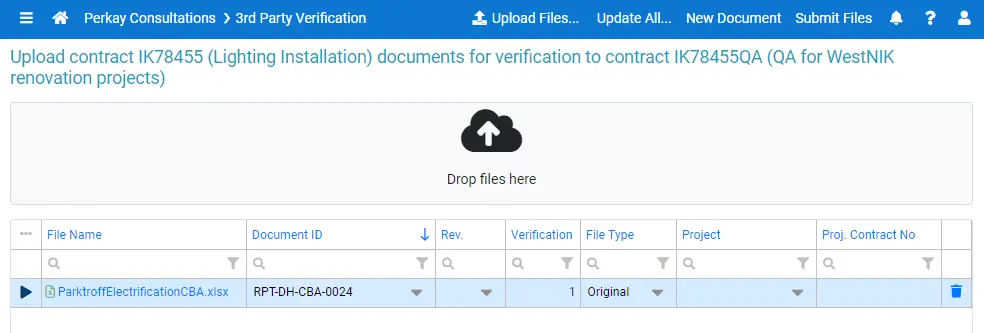
To progress, users need to click the "Upload New Files" button which will take them to the 3rd Party Verification Uploads app. In the app, they can upload the files they want to have verified and select Document IDs for each. For a document to be selectable, it needs to belong to the originator contract and, depending on whether it has been requested, have the current verifier contract added to its distribution setup. If needed, they can also adjust file type, project or revision values.
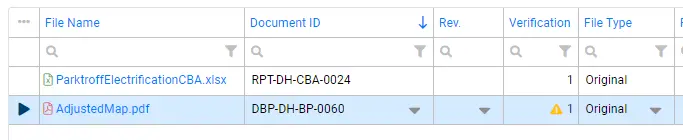
If a verification already exists for a particular document, then uploaded files will be added to that verification instead of a new verification being made. A warning icon in the Verification column will indicate when that would happen if the file was submitted.
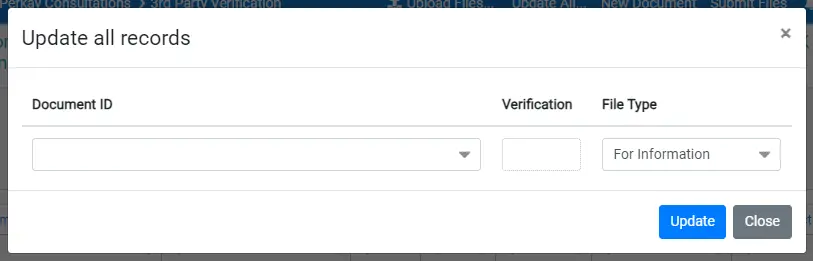
If all of the uploaded files share some part of their configuration, then they can be setup at the same time by using the "Update All" functionality. Clicking the "Update All..." button will open the "Update all records" dialog. Any fields set in that dialog will be applied to all files uploaded by the user for that specific contract pair upon clicking the "Update" button.
When all files have been uploaded and set up, the "Submit Files" button can be clicked to send them out for verification. Notifications will be sent to the verifier contract, the Document Responsibles of each of the selected documents and, depending on contract settings, the verification contract's company representative.
Before a verification is finished, an originator can cancel the verification or void files from it. This can be done from the 3rd Party Verification Overview app. Both actions will result in notifications being sent to the same receivers as when initiating a verification.
Performing a Verification
After members of an originator contract have uploaded some files to verify, members of verification contracts can carry out the verification process. Starting at the 3rd Party Verification register, verifiers select a contract pair from the "My Verification Contracts" list and are taken to the overview app.
While there, they can choose to download all of the files to be verified using the "Download Files for Verification" button in the toolbar. Alternatively, they can download them one by one from the list view. After completing their verifications, verifiers can upload their results one at a time or in batches.
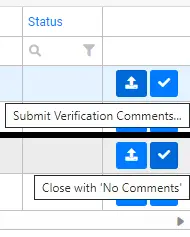
One at a time uploads can be done within the overview app by using the buttons available for active verifications: "Submit Verification Comments..." and "Close with 'No Comments'". "Close with 'No Comments'" only needs confirmation to set that acceptance code while "Submit Verification Comments..." requires the user to select the acceptance code themselves and allows them to upload files with verification comments.
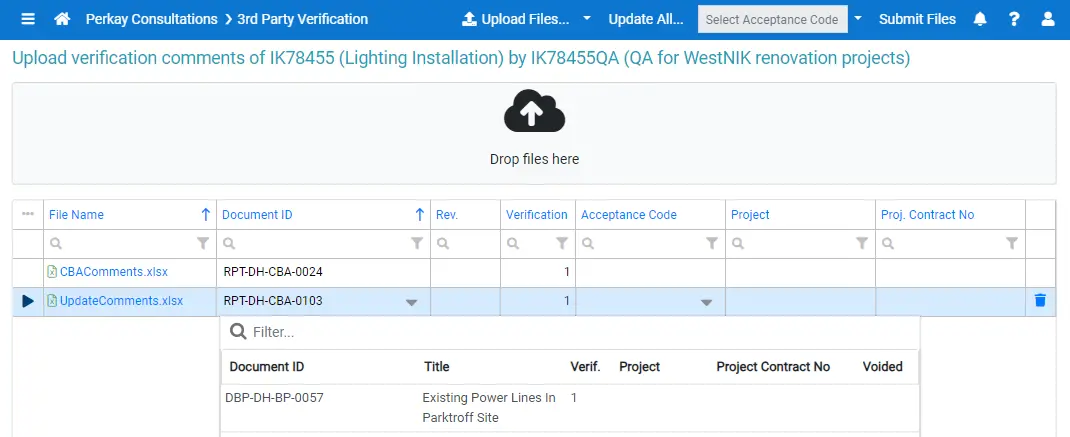
To upload in batches, users can click the "Upload Comments" button in the toolbar which will take them to the 3rd Party Verification Uploads app.
In the uploads app, there are two ways to upload and set up a file. The first way is just to upload files and set which verifications they are for using the lookup in the Document ID column.
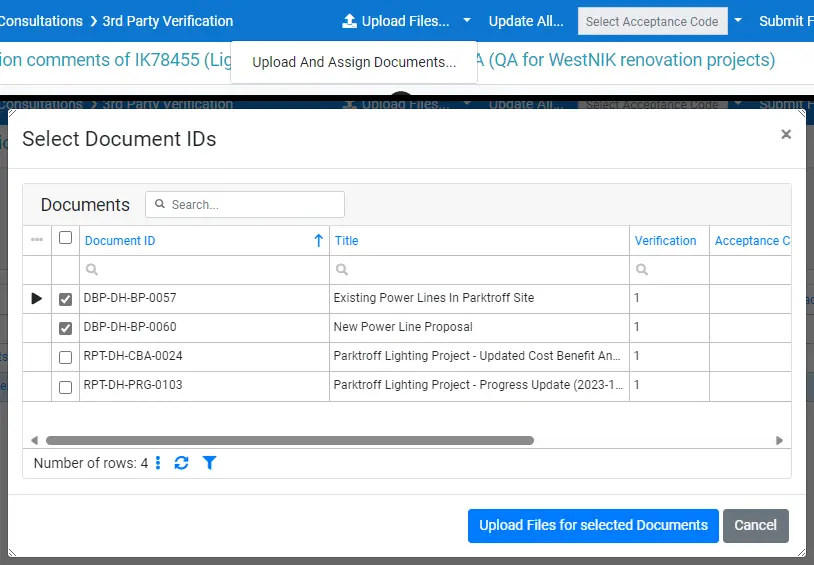
The second is to upload files using the "Upload And Assign Documents..." button in the dropdown that is next to the "Upload Files..." button. After the selected files have been uploaded, a dialog will open. It will contain a list of active verifications that the uploaded files could be assigned to. More than one verification can be selected during each upload. This can be quite helpful if the file being uploaded is relevant for multiple verifications as otherwise there would need to be separate uploads of the same file for each relevant verification.
After all files have been uploaded and had their documents/verifications set, acceptance codes can be set in the grid or in the toolbar. If a file has an acceptance code set in the grid, that code will be used. The toolbar acceptance code will only be used for files without a code set in the grid.
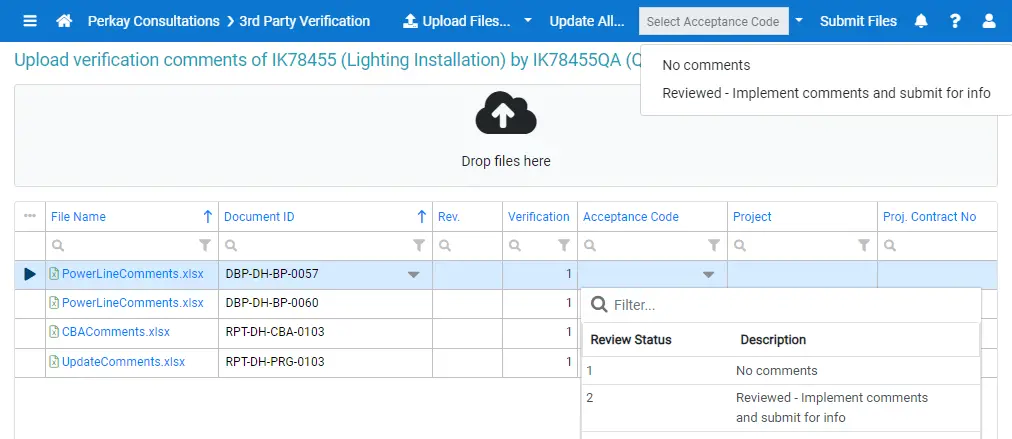
Once all files have been set up, the "Submit Files" button can be clicked to complete the verifications.
After verification comments are submitted (either from the overview or the uploads app), notifications are sent to the originator contract, the Document Responsibles of each of the documents being verified and, depending on contract settings, the contract company representatives for both the originator and verifier contracts.
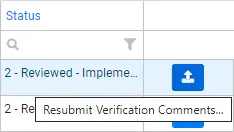
If later there is a need to update verification acceptance codes or add verification comments files, that can be done in the overview app by clicking the "Resubmit Verification Comments..." button that is available for completed verifications. Notifications will be sent out for all the same parties as when submitting verification comments for the first time.
Replying to Verification Comments
After a verification has been completed, originators will be able to upload replies for it.
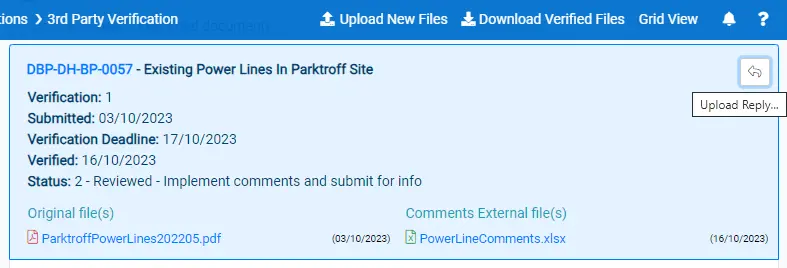
In the 3rd Party Verification Overview app, a user can use the "Download Verified Files" button to download verification comments for all filtered verifications. If any comments need a reply, originators can use the "Upload Reply..." button which is available for completed verifications.
Alternatively, the same process can be done in the 3rd Party Verification Uploads app by setting a file's type to "Reply to Comments" and selecting a verification.

After replies are submitted, notifications are sent out. The receivers are the same as when submitting files for verification.
Requesting Documents for Verification
Depending on the way the verification process is handled, verifiers may need to point out the documents they need for verification or information. This is usually done outside of Pims by sending the verifier a list of available documents, having them select which ones are needed, sending those requirements back to the originator and then setting them up for verification in Pims. With the "Request Documents" functionality, that can be handled within Pims.
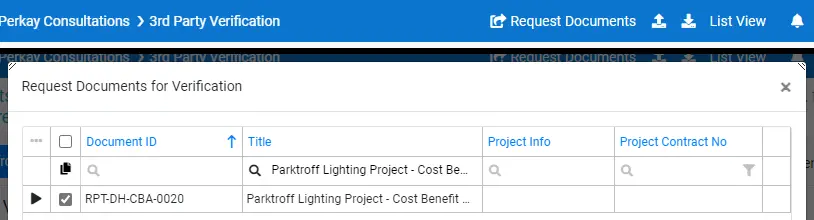
To start using the functionality, select a contract pair from the "My Verification Contracts" grid in the 3rd Party Verification Register and open it in the overview app. If that verification contract has requesting enabled, the "Request Documents" button will be available in the toolbar.
Clicking it will open a dialog that will allow a user to select the documents they need for verification. This list will show documents that belong to the originator contract but have not yet been sent out for 3rd Party Verification. After all the desired documents are selected, the "Request" button at the bottom of the dialog can be clicked to send out the request.
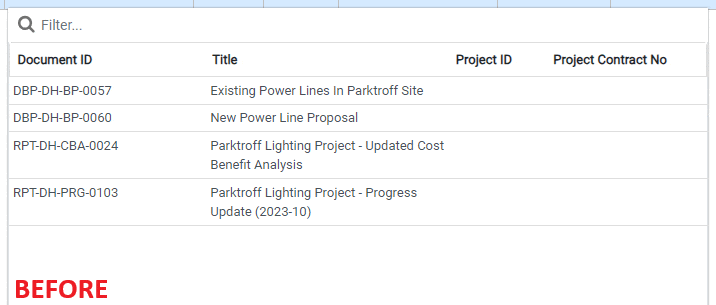
After a document has been requested, it will become available for originators to select when submitting files for verification, if it wasn't already.
3rd Party Verification Process as the Project Owner
Submitting Documents for Verification
While the 3rd Party Verification process is usually carried out by contractors, Pims also provides a way for internal users, with elevated permissions. to make use of it. They can do this through the 3rd Party Verification Follow-up app.
But before we go to the follow-up app, there are two things that need to done for a document to appear there:
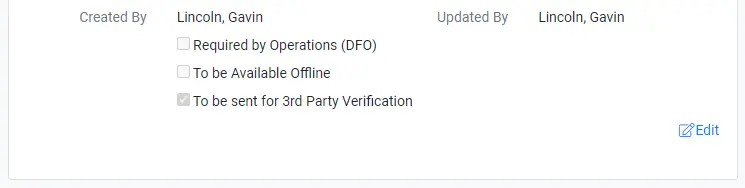
The first is to check the 'To be sent for 3rd Party Verification" checkbox in the Information tab of the Document Details app.
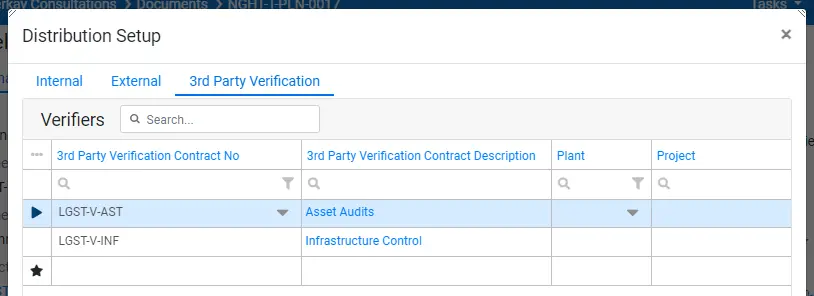
The second is to set the verification contracts that will be used to verify the document in its distribution setup.
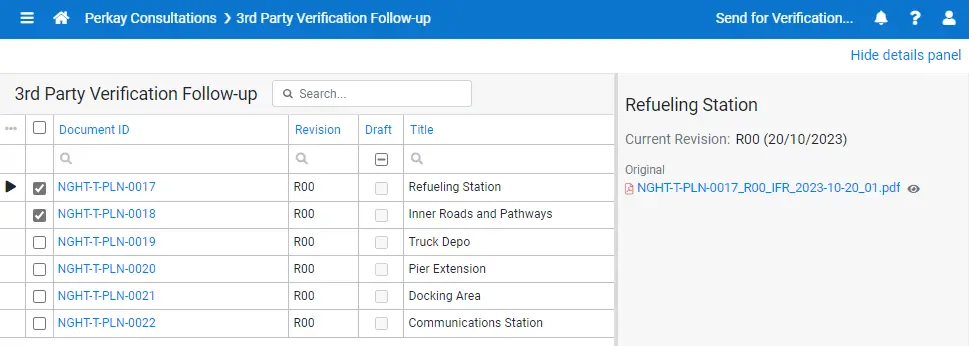
Once that is done, the document will appear in the 3rd Party Verification follow-up app. In the app, documents to be sent for verification can be selected in the main grid. After selecting all desired documents, the "Send for Verification..." button can be clicked.
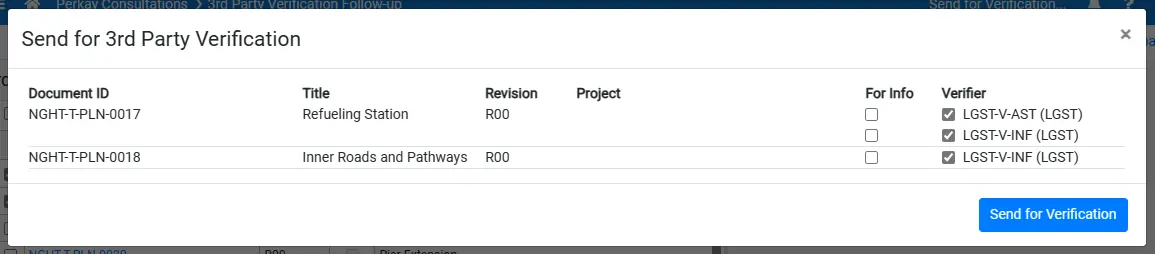
In the dialog that opens it will be possible to select which documents should be sent to which verification contracts and whether they should be sent for information. The contracts available are taken from each of the documents' distribution setups. Once all desired verifiers are selected, users can press the "Send for Verification" button to submit documents for verification. Notification receivers are the same as when submitting files as a contractor.
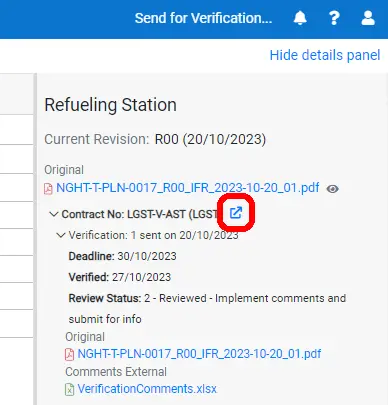
After a verification is completed, it's status can be seen in the details panel of the follow-up app. If there is a need to make a reply to the comments, it can be done by following the link provided next to the Verification Contract label for the verification. The link will take users to the 3rd Party Verification Overview app where they can submit a reply the same way that contractors do.
Managing Verifications
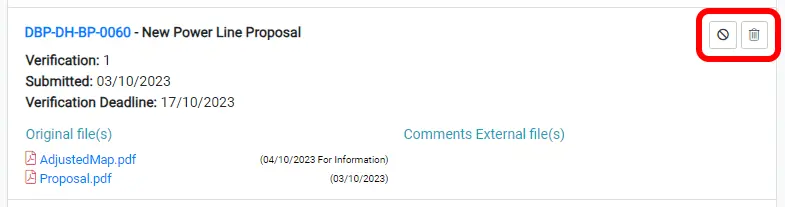
Internal users with the "3rd Party Verification: manage all" capability can manage verifications through the "Edit Verification" dialog. This dialog can be reached with the edit button at the end of a row in Grid View or in the top-right corner of a verification item in List view.
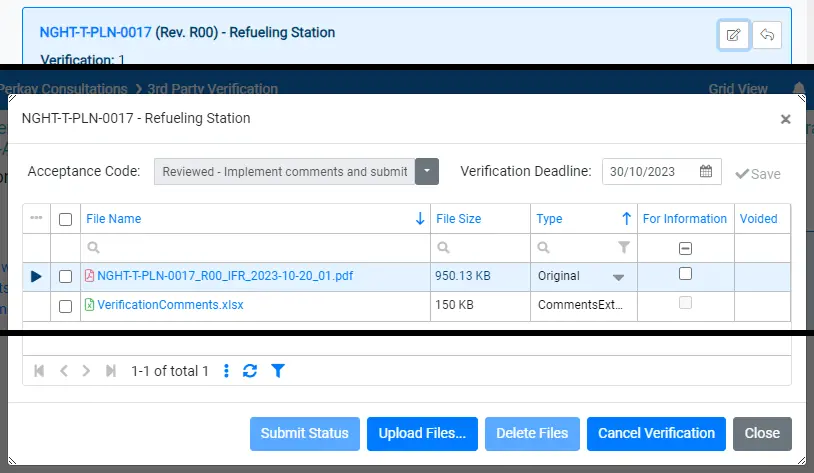
In the "Edit Verification" dialog, a user can:
- Set an acceptance code or change an existing acceptance code;
- Toggle whether files are "For Information" or not (except for Comments External files);
- Delete files from the verification;
- Delete the verification (except for when it contains Comments External files).